Using cloud-init to automate provisioning VM in proxmox
Using cloud-init to automate provisioning VM in proxmox
Proxmox Cloud-Init Made Easy: Automating VM Provisioning Like the Cloud - Virtualization Howto
Cloud-Init Support - Proxmox VE
Proxmox Cloud-Init Setup and Troubleshooting - YouTube
perparation
download cloud image
To use cloud-init in Proxmox VE to automate provisioning of Ubuntu VMs, you cannot use a normal Ubuntu Server ISO
Instead of the installer ISO, you need to download a cloud image that already has cloud-init support built-in. For Ubuntu 26.04 that would be from:
https://cloud-images.ubuntu.com/releases/26.04/release/ubuntu-26.04-server-cloudimg-amd64.imgcd /var/lib/vz/template/iso/
wget https://cloud-images.ubuntu.com/releases/26.04/release/ubuntu-26.04-server-cloudimg-amd64.img
generate ssh key
mkdir C:\Users\huang\.ssh\pve-vms

ssh-keygen -t rsa -b 4096 -f C:\Users\huang\.ssh\pve-vms\pve-vm-key

# This produces two files
# private key
C:\Users\huang\.ssh\pve-vms\pve-vm-key
# public key
C:\Users\huang\.ssh\pve-vms\pve-vm-key.pub
Step-by-Step Provisioning in Proxmox
Create a VM (no installer disk)
Create a new VM but don’t put an installation ISO on it.
qm create 401 --name ubuntu-cloud --memory 2048 --net0 virtio,bridge=vmbr0 --scsihw virtio-scsi-pci


qm create 401 \
  --name ubuntu-2604-template \
  --ostype l26 \
  --machine q35 \
  --cpu x86-64-v3 \
  --cores 2 \
  --memory 2048 \
  --scsihw virtio-scsi-single \
  --net0 virtio,bridge=vmbr0 \
  --agent enabled=1 \
  --serial0 socket \
  --vga serial0 \
  --net0 virtio,bridge=vmbr1 \
  --ipconfig0 ip=dhcp \
  --nameserver "192.168.1.3 1.1.1.1"
a VM template conf looks like
root@pve02:/var/lib/vz/template/iso# cat /etc/pve/qemu-server/401.conf

root@pve02:/var/lib/vz/snippets# qm config 401
agent: enabled=1
boot: order=scsi0
bootdisk: scsi0
cores: 2
cpu: x86-64-v3
ipconfig0: ip=dhcp
machine: q35
memory: 2048
meta: creation-qemu=11.0.3,ctime=1791372215
name: ubuntu-2604-template
net0: virtio=BC:24:11:F9:00:7F,bridge=vmbr1
ostype: l26
scsi0: local-zfs:vm-401-disk-0,discard=on,iothread=1,size=32G,ssd=1
scsihw: virtio-scsi-single
serial0: socket
smbios1: uuid=6c71f7bd-e756-4b71-838a-040b4b74ef3e
vga: serial0
vmgenid: a4dd61a8-3c4e-4e8e-97ce-793e7a4b7d89
Import the cloud image
On the Proxmox host:
# qm importdisk <vmid> <source_path> <storage_pool>
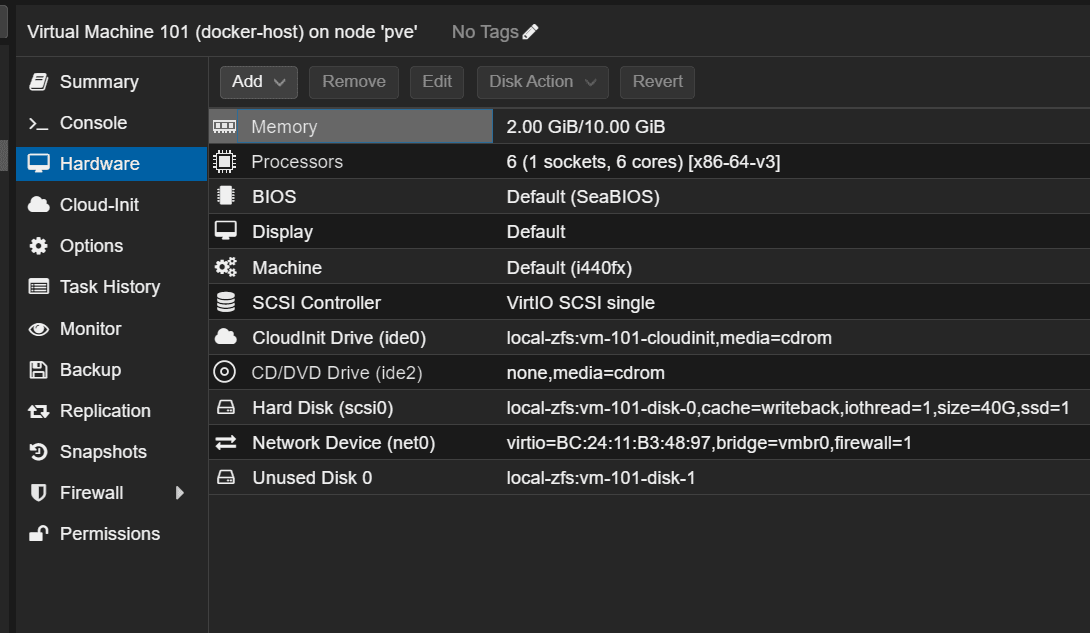
qm importdisk 401 /var/lib/vz/template/iso/ubuntu-26.04-server-cloudimg-amd64.img local-zfs --format qcow2

root@pve:~# qm importdisk 101 /var/lib/vz/template/iso/ubuntu-24.04-server-cloudimg-amd64.img local-zfs --format qcow2
importing disk '/var/lib/vz/template/iso/ubuntu-24.04-server-cloudimg-amd64.img' to VM 101 ...
format 'qcow2' is not supported by the target storage - using 'raw' instead
transferred 0.0 B of 3.5 GiB (0.00%)
transferred 3.5 GiB of 3.5 GiB (100.00%)
unused0: successfully imported disk 'local-zfs:vm-101-disk-0'
# Then in the VM Hardware tab attach that disk as `scsi0`
qm set 101 --scsihw virtio-scsi-pci --scsi0 local-zfs:vm-101-disk-0
qm set 401 --scsi0 local-zfs:vm-401-disk-0,discard=on,iothread=1,ssd=1
# setup scsi0 as boot drive
qm set 401 --boot order=scsi0
qm set 401 --bootdisk scsi0
#optional resize the disk
qm config 401
qm disk resize 401 scsi0 32GCreate a cloud-config script to install packages
mkdir -p /var/lib/vz/snippets

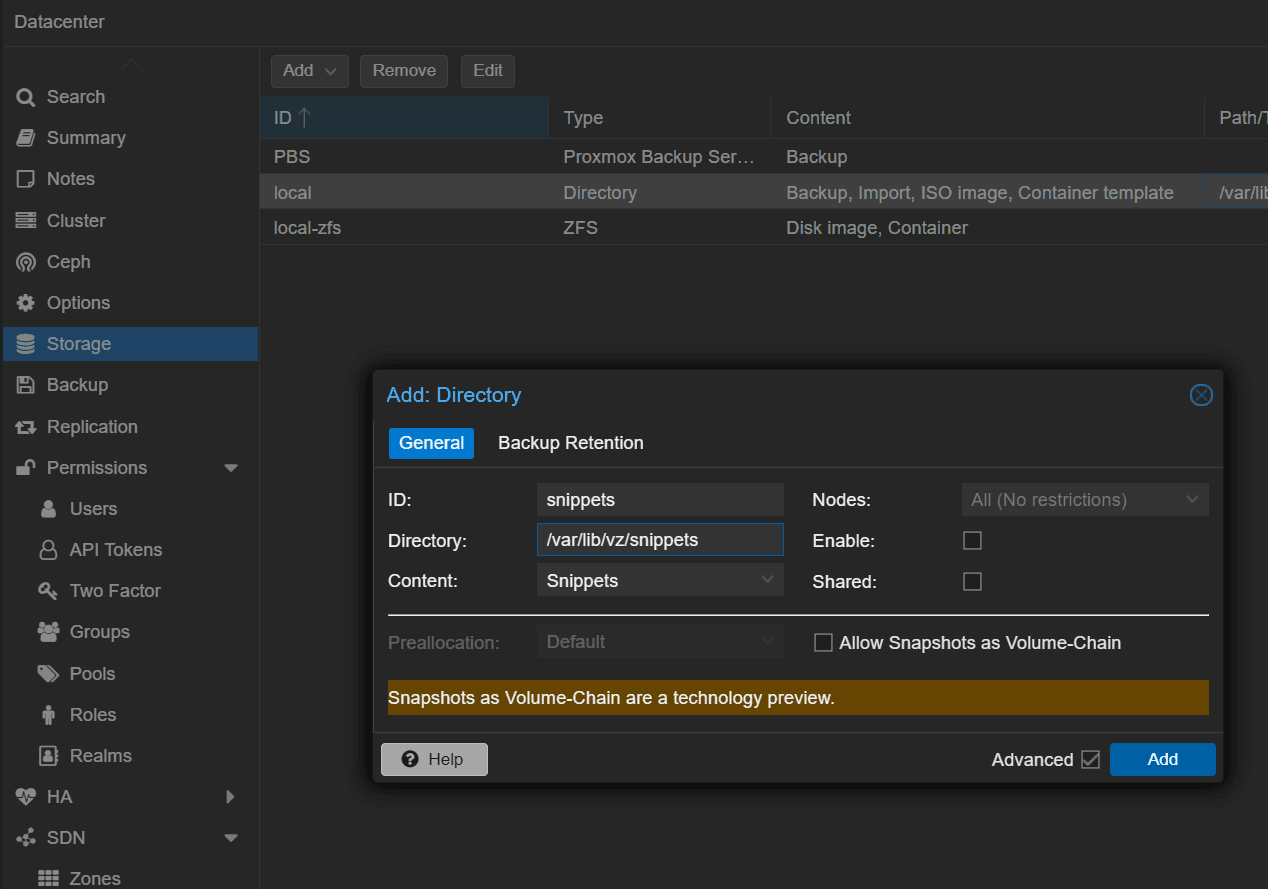
pvesm set local --content iso,vztmpl,backup,snippets

nano /var/lib/vz/snippets/ubuntu-2604.yaml
root@pve02:/var/lib/vz/snippets# cat /var/lib/vz/snippets/ubuntu-2604.yaml
#cloud-config
hostname: ubuntu
manage_etc_hosts: true
users:
- name: greenhuang
groups:
- sudo
shell: /bin/bash
sudo: ALL=(ALL) NOPASSWD:ALL
ssh_authorized_keys:
- <ssh-public-key>
ssh_pwauth: false
package_update: true
package_upgrade: true
packages:
- qemu-guest-agent
- curl
- wget
- vim
- git
- htop
timezone: Australia/Melbourne
runcmd:
# Enable Proxmox QEMU Guest Agent
- systemctl enable --now qemu-guest-agent
# Remove all installed Snap packages
- |
if command -v snap >/dev/null 2>&1; then
snap list | awk 'NR>1 {print $1}' | xargs -r -n1 snap remove --purge || true
fi
# Remove snapd itself
- apt-get purge -y snapd
# Remove leftover Snap directories
- rm -rf /snap
- rm -rf /var/snap
- rm -rf /var/lib/snapd
- rm -rf /home/greenhuang/snap
# Prevent snapd being installed again accidentally
- |
cat >/etc/apt/preferences.d/nosnap.pref <<'EOF'
Package: snapd
Pin: release a=*
Pin-Priority: -10
EOF
# Cleanup
- apt-get autoremove -y
- apt-get cleanAttach that cloud-config to your VM
qm set 401 --cicustom "user=local:snippets/ubuntu-2604.yaml"

qm set 401 --ide2 local-zfs:cloudinit

# validate
root@pve02:/var/lib/vz/snippets# pvesm path local:snippets/ubuntu-2604.yaml
/var/lib/vz/snippets/ubuntu-2604.yaml
(optional) Add the Cloud-Init drive
In the Proxmox VM web UI:
Go to Hardware → Add → CloudInit Drive
Select a storage (like local-lvm)
Click Add
This attaches a virtual CD-ROM that Proxmox will put cloud config on.
create snippets storage
create snippets storage in /var/lib/vz/snippets to storage cloud-init files
VM conf template
root@pve02:/var/lib/vz/snippets# qm config 401

agent: enabled=1
boot: order=scsi0
bootdisk: scsi0
cicustom: user=local:snippets/ubuntu-2604.yaml
cores: 2
cpu: x86-64-v3
ide2: local-zfs:vm-401-cloudinit,media=cdrom
ipconfig0: ip=dhcp
machine: q35
memory: 2048
meta: creation-qemu=11.0.3,ctime=1791372215
name: ubuntu-2604-template
nameserver: 192.168.1.3 1.1.1.1
net0: virtio=BC:24:11:F9:00:7F,bridge=vmbr1
ostype: l26
scsi0: local-zfs:vm-401-disk-0,discard=on,iothread=1,size=32G,ssd=1
scsihw: virtio-scsi-single
serial0: socket
smbios1: uuid=6c71f7bd-e756-4b71-838a-040b4b74ef3e
vga: serial0
vmgenid: a4dd61a8-3c4e-4e8e-97ce-793e7a4b7d89
dry run
If everything is correct, it should dump the contents of your custom ubuntu-2604.yaml.
root@pve02:/var/lib/vz/snippets# qm cloudinit dump 401 user

#cloud-config
hostname: ubuntu-2604-template
manage_etc_hosts: true
fqdn: ubuntu-2604-template
chpasswd:
  expire: False
users:
  - default
package_upgrade: true
Also check the network Cloud-Init generated by Proxmox
root@pve02:/var/lib/vz/snippets# qm cloudinit dump 401 network

version: 1
config:
    - type: physical
      name: eth0
      mac_address: 'bc:24:11:f9:00:7f'
      subnets:
      - type: dhcp4
    - type: nameserver
      address:
      - '192.168.1.3'
      - '1.1.1.1'
      search:
      - 'greenhuang.local'
VM validation
root@pve02:/var/lib/vz/snippets# qm cloudinit update 401
generating cloud-init ISO

root@pve02:/var/lib/vz/snippets# qm start 401
generating cloud-init ISO

# boot up from cloud-init
root@pve02:/var/lib/vz/snippets# qm terminal 401
starting serial terminal on interface serial0 (press Ctrl+O to exit)
***
[  OK  ] Finished cloud-final.service - Cloud-init: Final Stage.
[  OK  ] Reached target cloud-init.target - Cloud-init target.

ubuntu login:


# if something not correct just regenerate
qm stop 401
qm cloudinit update 401
qm start 401