Setup fileserver for AD forest
Setup fileserver for AD forest
VM setup
Use VirtIO devices (disk + NIC) for performance.使用 VirtIO 设备(磁盘 + 网卡) 可提高性能
Disk controller: use VirtIO SCSI single and (if available) enable IO Thread. 磁盘控制器: 使用 VirtIO SCSI 单盘 ,并(如果可用)启用 IO 线程
Install VirtIO drivers + QEMU Guest Agent in Windows (helps Proxmox see IP/shutdown cleanly, etc.). 在 Windows 系统中安装 VirtIO 驱动程序和 QEMU Guest Agent (有助于 Proxmox 正确识别 IP 地址/正常关机等)。
Set static IP, correct DNS, correct time/NTP, then run Windows Update fully.设置静态 IP 地址 、正确的 DNS 设置 、正确的时间/NTP 设置,然后完整运行 Windows 更新 。
If you have an AD domain, join the server to the domain and place it in the right OU (so GPOs apply cleanly).如果您有 AD 域, 请将服务器加入该域并将其放置在正确的 OU 中(以便 GPO 可以顺利应用)
troubleshoot
if you add a disk but it said this disk is offline policy set by administrator follow this guide Nutanix Support & Insights to reset SAN policy
C:> diskpart

DISKPART> SAN
SAN Policy : Offline Shared

DISKPART> SAN POLICY=OnlineAll

DISKPART> list disk

DISKPART> select disk *

DISKPART> Online disk

DISKPART> attributes disk clear readonly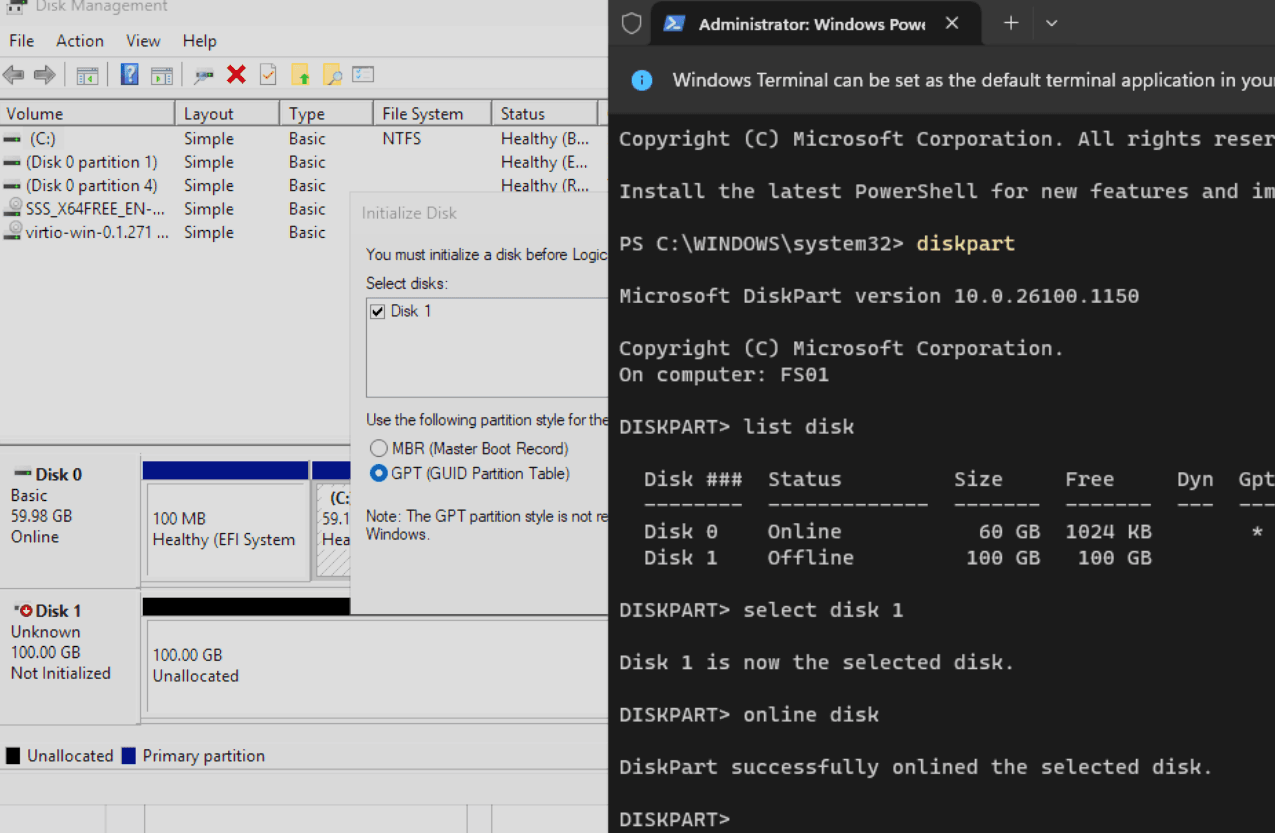
file server setup
enable Shadow Copies (Previous Versions) services
- Open Services: Press
Win + R, typeservices.msc, and press Enter, or search for "Services" and run as administrator.
打开服务: 按Win + R,输入services.msc,然后按 Enter,或者搜索“服务”并以管理员身份运行。 - Locate Service: Find "Volume Shadow Copy" in the list.
查找服务: 在列表中找到“卷影复制”。 - Set Properties: Right-click it and select Properties.
设置属性: 右键单击并选择 “属性” 。 - Configure Startup: Change "Startup type" to Automatic.
配置启动: 将“启动类型”更改为 “自动” 。 - Start Service: Click Start, then Apply, then OK.启动服务: 单击 “启动” ,然后单击“应用” ,再单击“确定”
Enable Shadow Copies for a Drive (For "Previous Versions")
为驱动器启用卷影副本(用于“以前的版本”)
- Open File Explorer: Right-click on the drive (e.g., C:) you want to enable VSS for.
打开文件资源管理器: 右键单击要为其启用 VSS 的驱动器(例如 C:)。 - Select Properties: Choose Properties.
选择属性: 选择属性 。 - Go to Shadow Copies: Click the Shadow Copies tab.
转到“卷影副本”: 单击“ 卷影副本” 选项卡。 - Configure Settings: Select the volume and click Settings, then click Enable and set storage limits.
配置设置: 选择卷并单击 “设置” ,然后单击 “启用” 并设置存储限制。
security
SMB Security Enhancements | Microsoft Learn
disable smbv1 and Enable SMB signing
Set-SmbServerConfiguration -EnableSMB1Protocol $false -Confirm:$false

Set-SmbServerConfiguration -RequireSecuritySignature $true
Use SMB encryption for sensitive shares对敏感共享文件使用 SMB 加密 You can encrypt per-share:您可以对每个共享文件进行加密:
Set-SmbShare -Name "Accounting" -EncryptData $True -ForceTurn on Access-Based Enumeration (ABE)启用基于访问的枚举 (ABE) Hides folders/files users don’t have rights to (reduces confusion and information leakage).隐藏用户无权访问的文件夹/文件(减少混乱和信息泄露)。
Set-SmbShare -Name "Projects" -FolderEnumerationMode AccessBased