Using Microsoft Entra ID as authentication for Cloudflare Zero Trust (Cloudflare Access)
Use Microsoft Entra ID as an identity provider (IdP) so that all access to self-hosted applications behind Cloudflare requires login (SSO + MFA). This adds an extra authentication layer without exposing the app directly.
Microsoft Entra ID · Cloudflare One docs
Architecture (simple)
User → Cloudflare Access → Entra ID login → Cloudflare validates → App
Cloudflare acts as a gate in front of your app and enforces authentication before traffic reaches your server.
Prerequisites
- Cloudflare Zero Trust account
- Microsoft Entra ID tenant
- Domain/app behind Cloudflare (via proxy or Cloudflare Tunnel)
- Admin access to both platforms
Step 1 — Create app in Entra ID
-1. Log in to the Microsoft Entra admin center ↗.
-
Go to Applications > Enterprise applications.
-
Select New application, then select Create your own application.
-
Name your application.
-
Select Register an application to integrate with Microsoft Entra ID (App you're developing). If offered, do not select any of the gallery applications. Select Create.
-
Redirect URI (Web):
https://<your-team-name>.cloudflareaccess.com/cdn-cgi/access/callback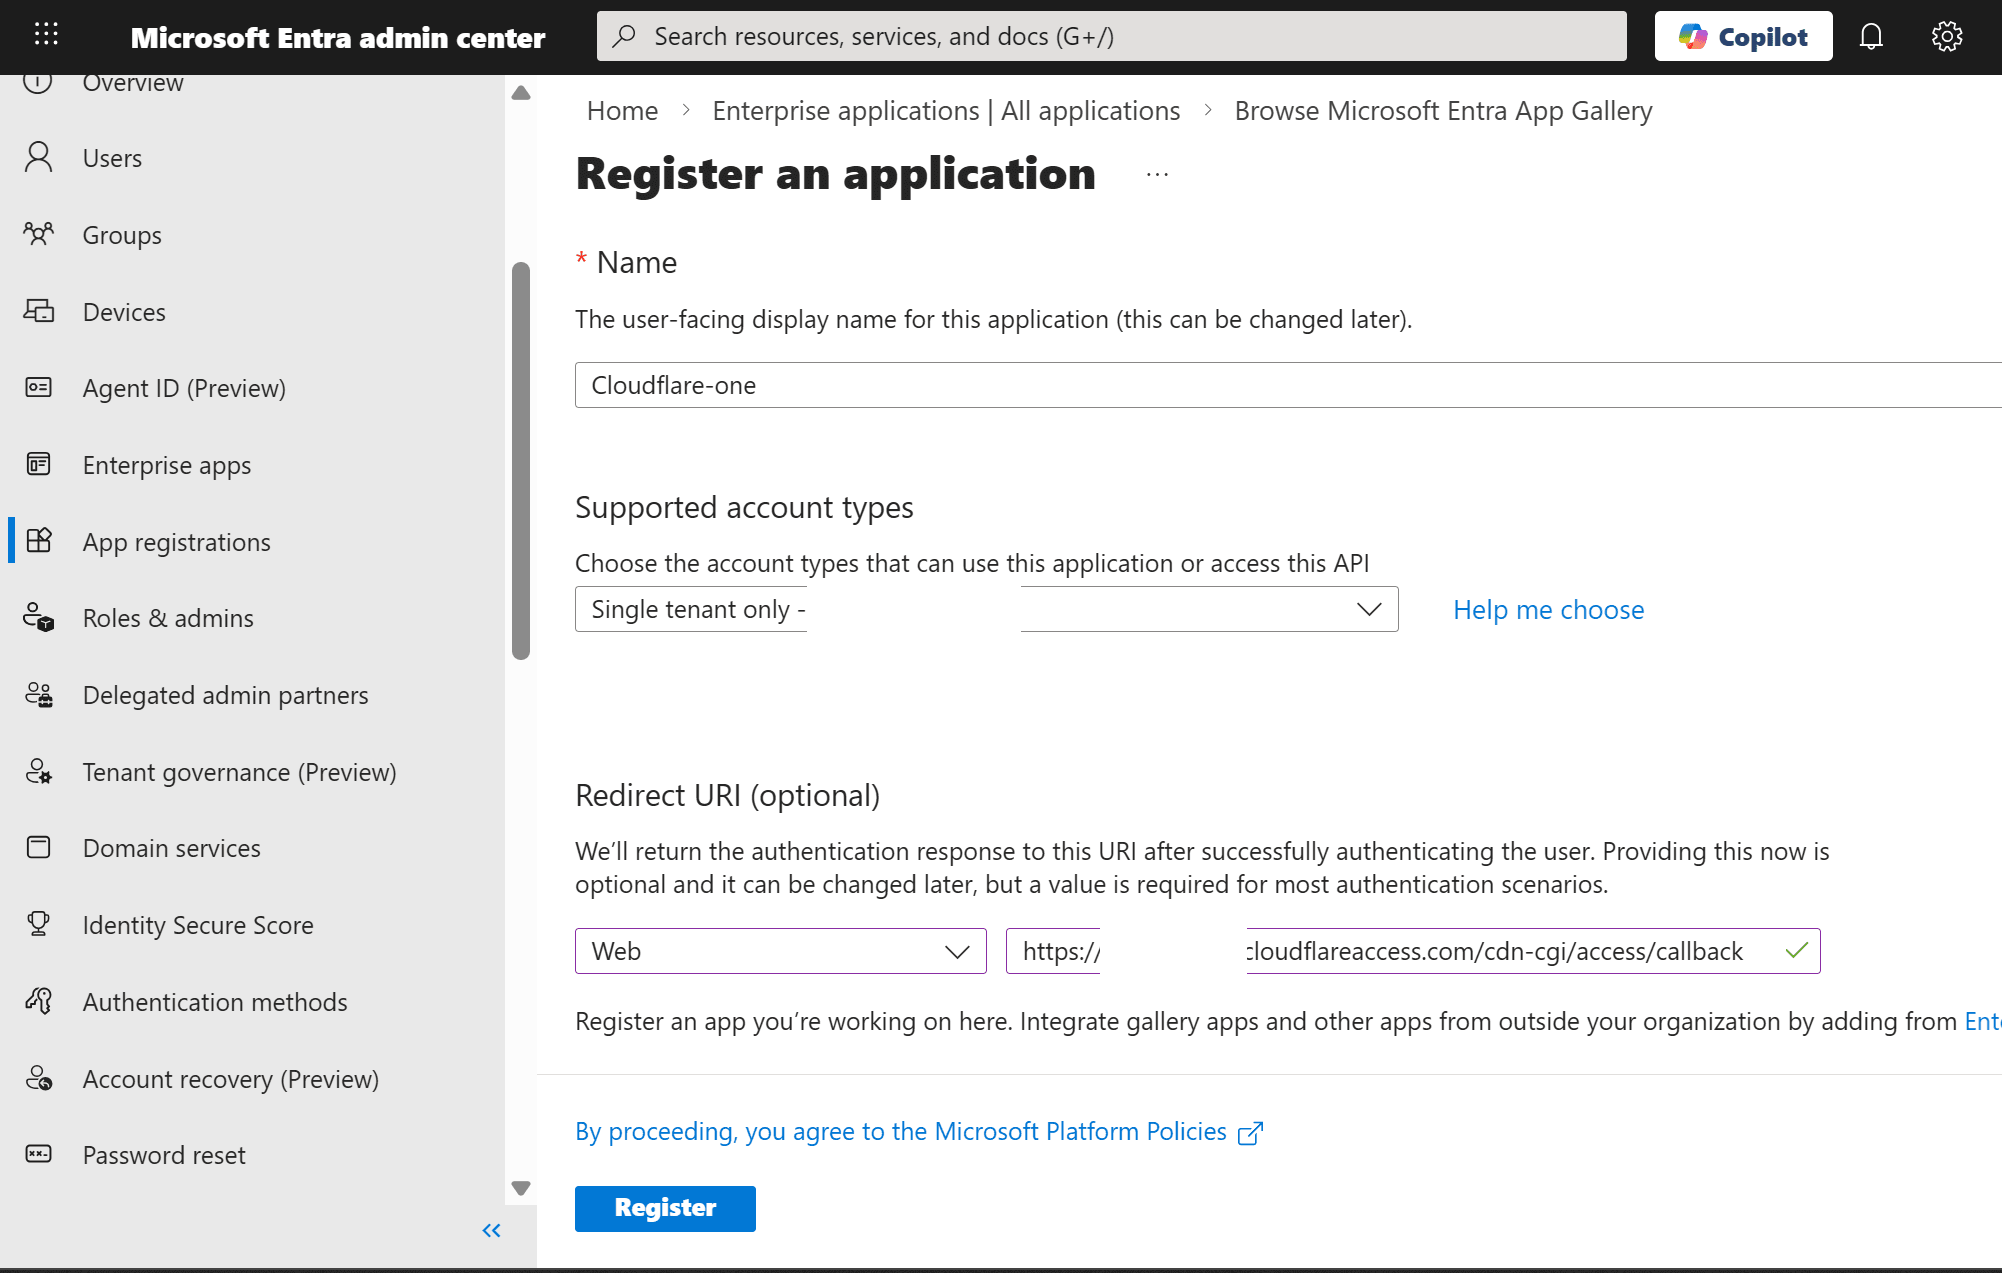
-
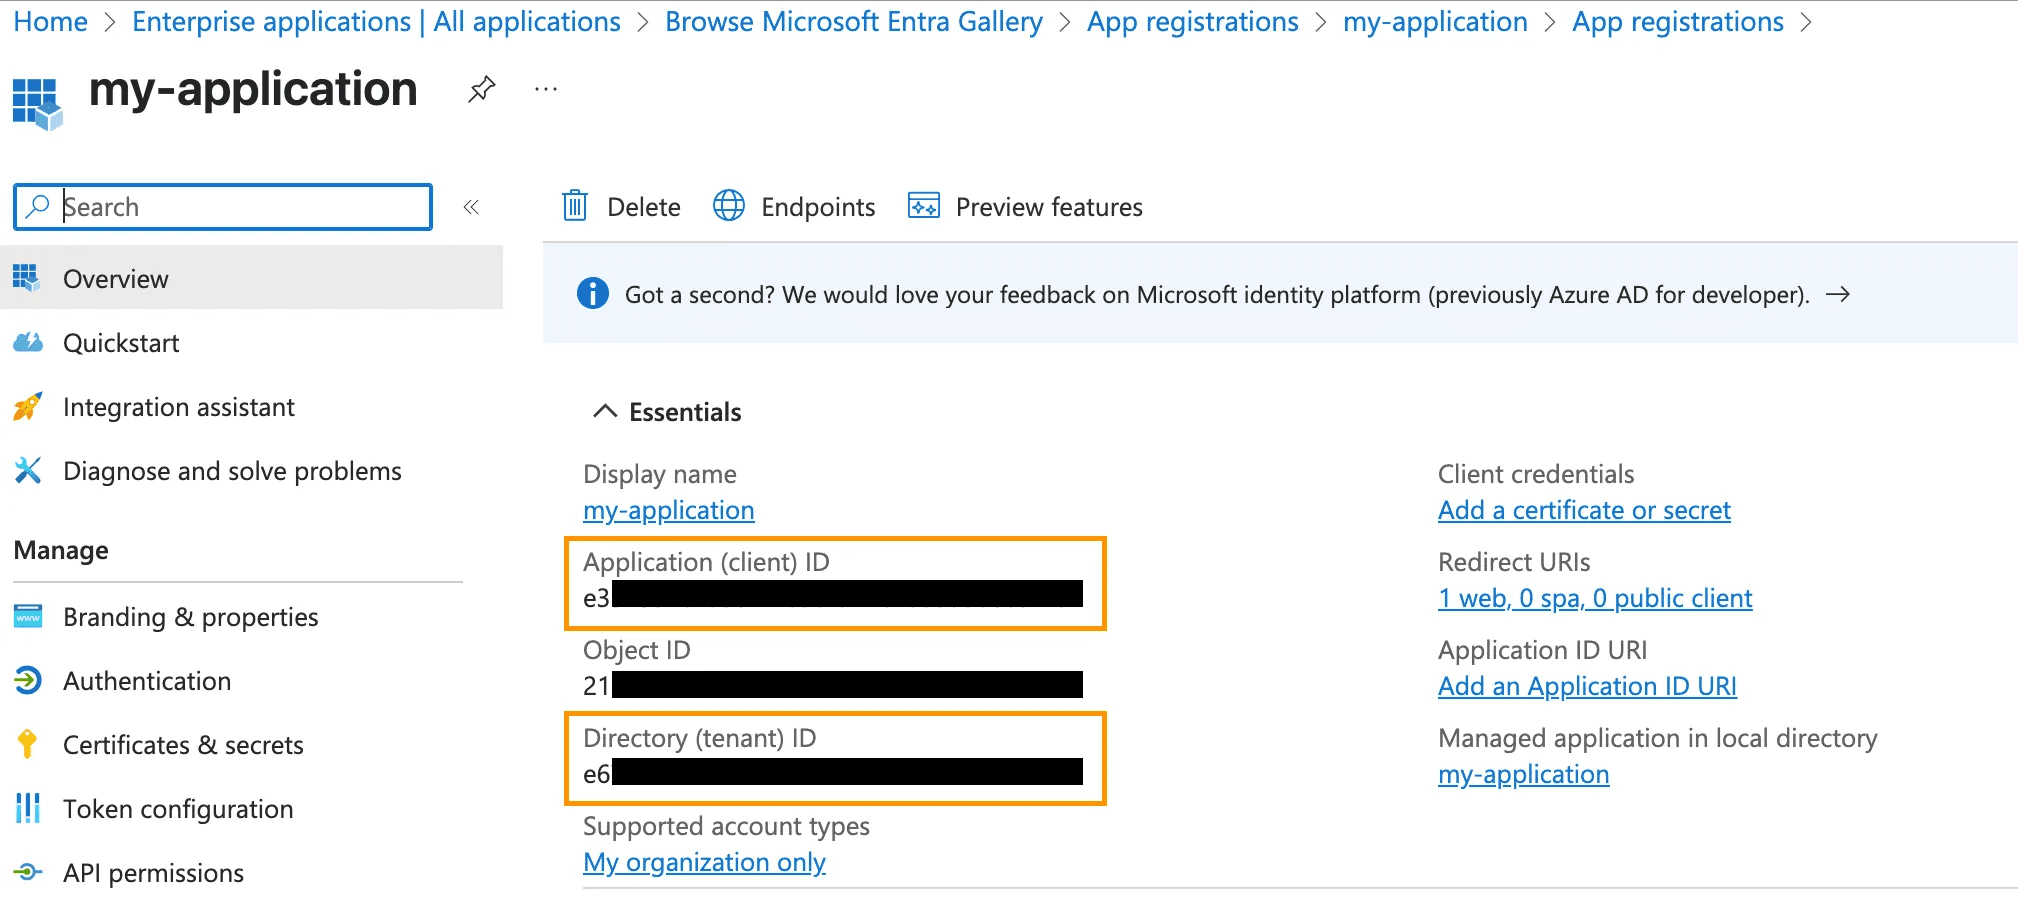
After creation, copy:
- Application (client) ID
- Directory (tenant) ID
-
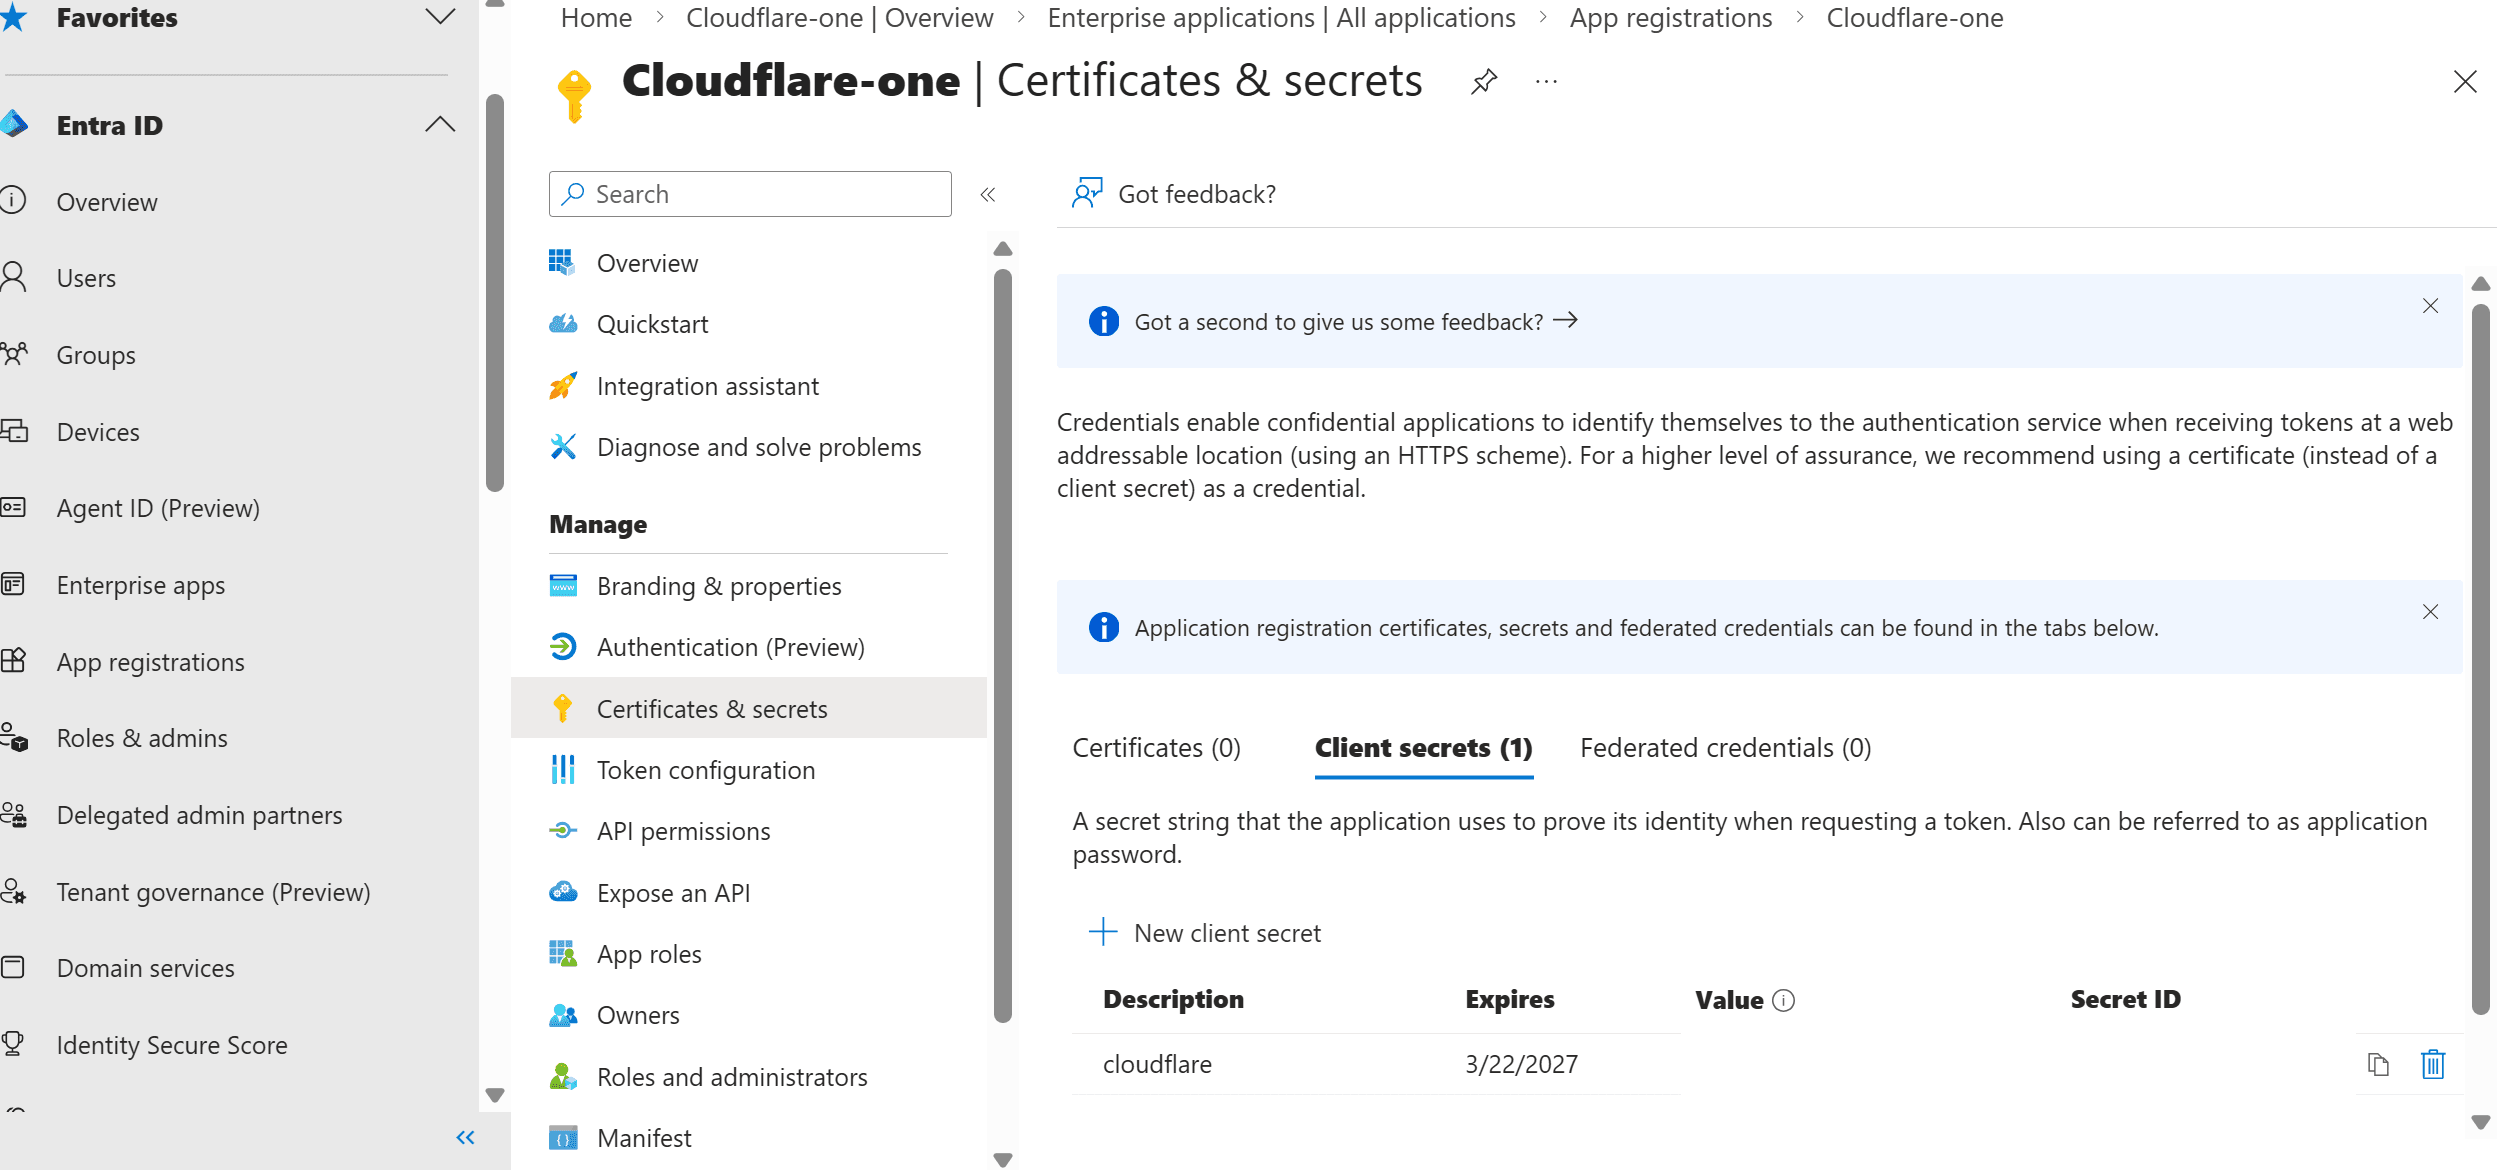
Create a client secret and save it
2. Configure API permissions in Entra ID
-
Go to App registrations > All applications > select your application > API permissions.
-
Select Add a permission.
-
Select Microsoft Graph.
-
Select Delegated permissions and enable the following permissions ↗:
emailoffline_accessopenidprofileUser.ReadDirectory.Read.AllGroupMember.Read.All
Note
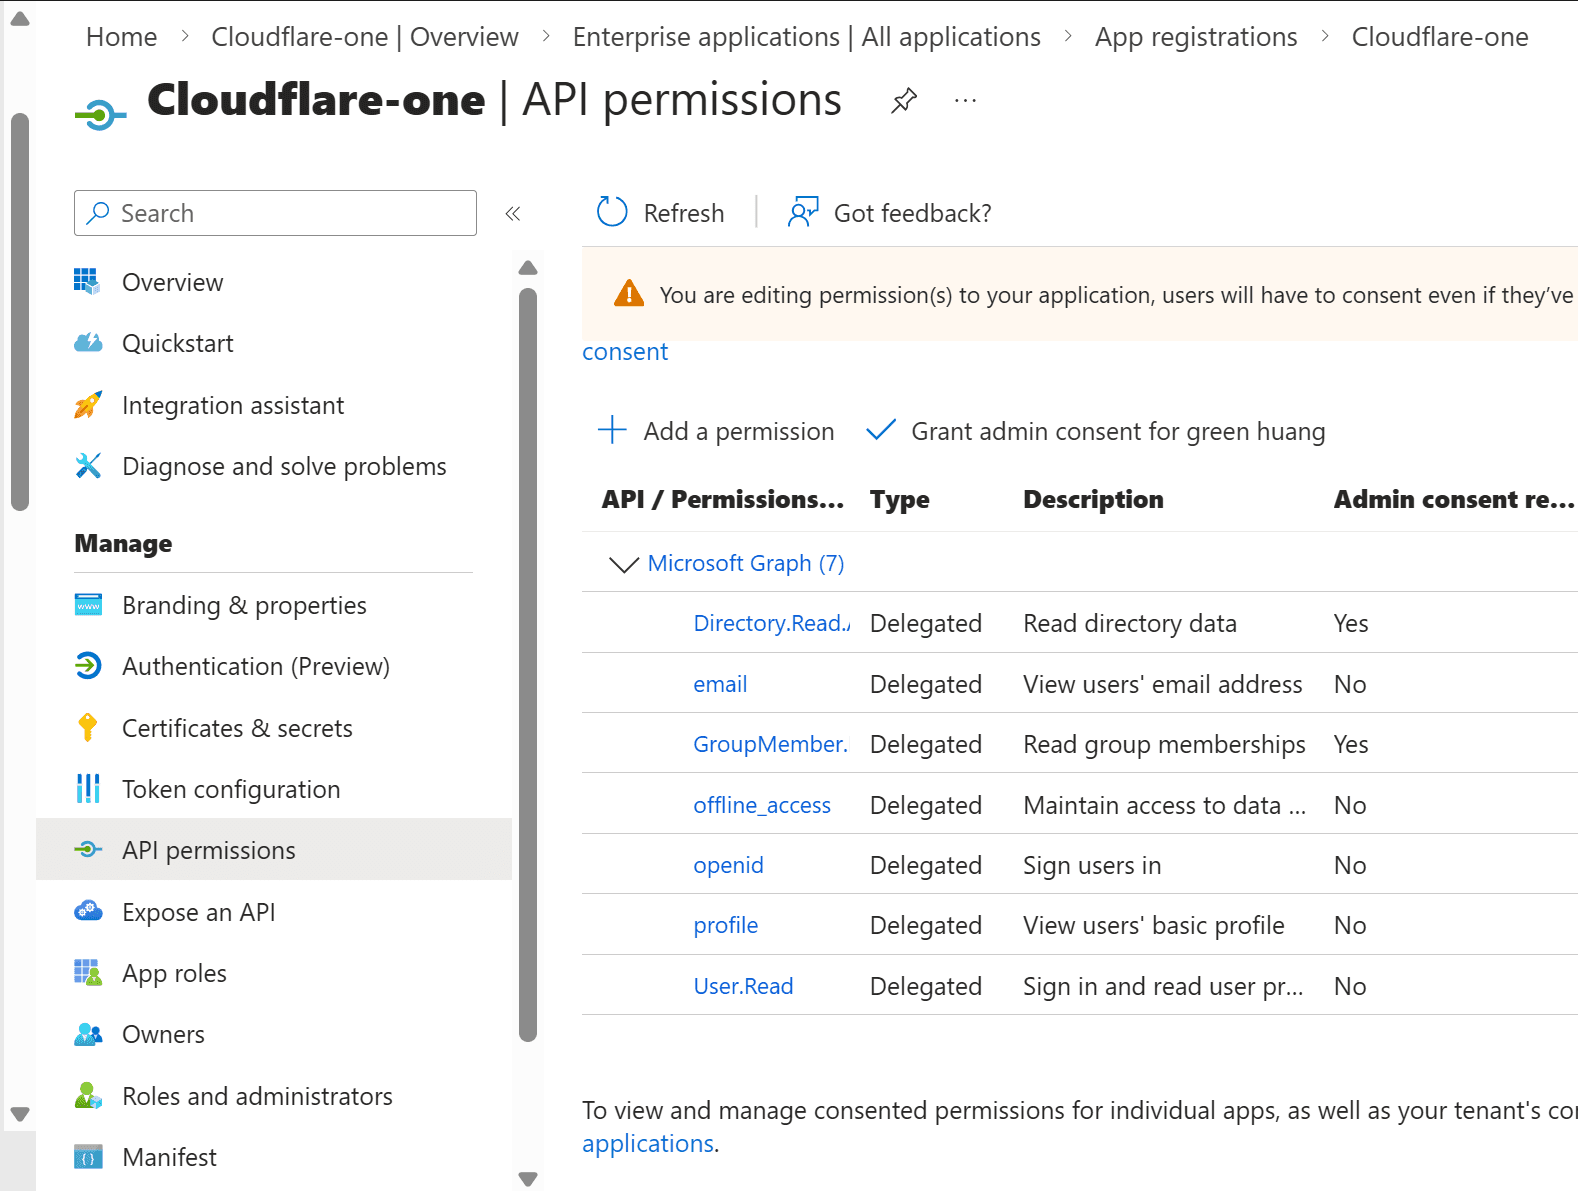 More narrow permissions may be used, however this is the set of permissions that are tested and supported by Cloudflare.
-
Once all seven permissions are enabled, select Add permissions.
-
Select Grant admin consent.
Step 2 — Add Entra ID to Cloudflare
- Go to Cloudflare Zero Trust dashboard
- Settings → Authentication → Add new login method
- Select Microsoft Entra ID
- Enter:
- Client ID
- Client Secret
- Tenant ID
- Save
Cloudflare will now redirect users to Entra ID for login.
Step 3 — Protect your self-hosted app
- Go to Access → Applications → Add application
- Type: Self-hosted
- Enter your app domain (e.g. app.yourdomain.com)
- Set policy:
- Allow → emails / domain / group
- Example: only your Entra account
Now any request to the app requires authentication.
Step 4 — (Recommended) Use groups for control
- Create a group in Entra ID (e.g. “homelab-admin”)
- Assign your user
- In Cloudflare Access policy, allow that group
This allows scalable access control instead of per-user rules.
Step 5 — (Optional) Enable SCIM sync
- Sync users and groups from Entra to Cloudflare
- Enables automatic access removal if user is deleted
- Improves lifecycle management
Step 6 — (Optional) Enforce Conditional Access
- Use Entra ID policies (MFA, device compliance, location)
- Cloudflare can enforce these at login